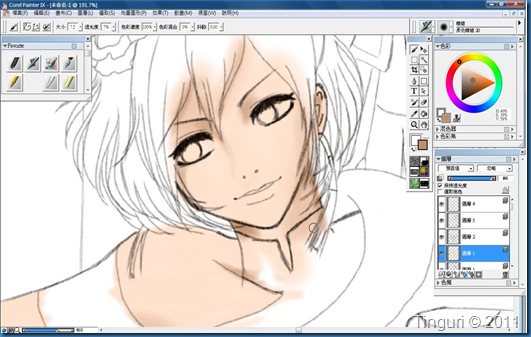
Continuing with my last entry, now it’s time to get this piece colored! Example used is the Dynasty Warriors 7 couple fan art of Liu Bei and Sun Shang Xiang. Software used: Corel Painter IX.5 and Hardware used: Wacom Bamboo tablet. From the last step, add a new layer, rename if required, for skin color! Place the layer under the line layer.
1. For coloring, I like to use Airbrush! Set the opacity to around 60 to 80% as you feel like it, then cover the parts where skin is exposed, that is, doing a base color for skin. Using a selection tool or the-I-don’t-know-how-to translate-it tool (the first check box just above the layers on the right hand side of the image, where you can actually see the tick), playing with the colors again, now do the shadows (I always started with shadows) with opacity around 2-5%, eyedrop the different shades if needed. When the shades are done, do the light parts, e.g. front, nose, cheeks and chin on the face. Usually after having done the skin, I will color the part of the eye white or greyish white for the following step.
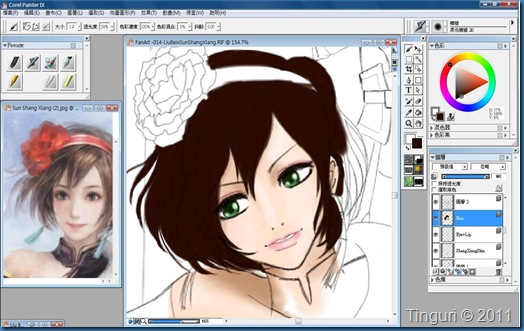
2. Add a new layer again, above the skin, basically, my skin layer is always amongst the most bottom layers. Select the eye color, do the base color again with the stronger opacity, and play with the other colors with a weaker opacity like 5-10%.
3. I usually like to do the lips on the same layer as the eye. Same technique, base color + high opacity, other colors (light and shades) + low opacity.
4. Add another layer, again, there’ll be loads of layers to add when you are not sure which layer comes above or which comes below. The hair layer will be above the Eye and Skin layers, but sometimes I put it in the middle, depends on how I used the layer, that is, I may color other objects on a layer which I used for e.g. for eye and lip.
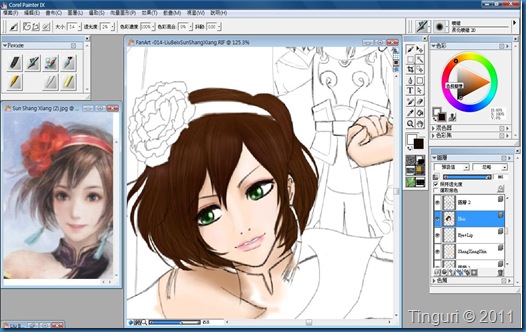
5. When the base color is done, repeate the above coloring steps. For the hair texture, I would use a brush size around 2-4 with a rather strong opacity 10-15%, choose a darker hair color and grab all my patience, follow the flow of the hair.
6. You can do the same to add some lighter hair texture! Sometimes I would do the lighter parts again, or simply use the blur tool.
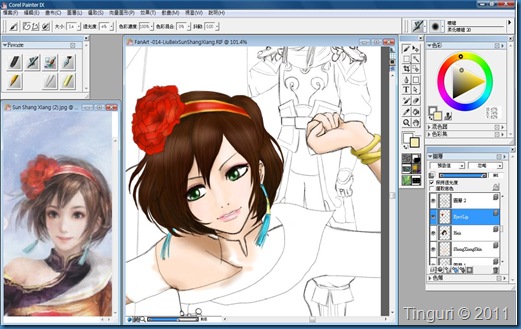
7. And again, another layer for accessories, this layer is above the Hair layer as you can see the colors of the accessories should cover that of the hair.
8. Here comes the outfit! Be prepared to have many layers for this issue! All are above the skin layer. Base color –> Shadow –> Light –> Details –> Light + Shade again!
9. Outfit near completion~! Use existing layers wisely for the overlapping details on the outfit or simply use a new layer~!
10. See the golden flower detail? It could be done on a new layer due to its complicated nature, so that when errors occur, you can always erase it without erasing the already done base (red part here). Then add and play with the layers for the other character, which I will completely ignore due to repetitive steps here, add a background layer below the skin layer and voila!


No comments:
Post a Comment